Saturday, 30 January 2010

Information On Passes


Information On Passes... This is what I found out... Taken me ages to write it out.
While some people use the terms interchangeably, Rendering in layers is the process of rendering different objects in your scene separately, so that a different image is rendered for each layer of objects. Rendering in passes is the process of rendering different attributes of your scene separately, such as the different pass types below.

A beauty pass (sometimes called diffuse pass or color pass) is the main, full-color rendering of your subject, including diffuse illumination, color, and color maps. A beauty pass usually will not include reflections, highlights, and shadows, which are usually separate passes.

Highlight passes (sometimes called specular passes) isolate the specular highlights from your objects. You can render highlight passes by turning off any ambient light and making the object’s diffuse shading and color mapping to pure black. The result will be a rendering of all the specular highlights in the scene, over a black background, without any other types of shading.

A reflection pass includes reflections of other objects or the surrounding environment, and can either replace or complement the highlight pass. To isolate reflections, usually all you need to do is turn off ambient, diffuse, and specular shading from a surface, so that only reflections appear.

A shadow pass is a rendering that shows the locations of shadows in a scene. A shadow pass often appears as a white shadow region against a black background, a black shadow against a white background, or a rendering with the shadow shape embedded in the alpha channel. Cast shadows are where an object casts a shadow onto another 3D object or darkens an area of a live-action plate. Separate shadow passes can depict attached shadows, where an object casts shadows onto itself, such as the shadow a character's nose casts onto his own face.

A lighting pass is an optional part of multi-pass rendering, that adds flexibility and control to the compositing process. Instead of rendering a beauty pass all at once, you could instead render multiple lighting passes, with each individual lighting pass showing the influence of one light (or one group of lights) on an element. Other lights are hidden or deleted when rendering the lighting pass.

Effects passes may sometimes be rendered, depending on the needs of your project. An effects pass is a separate rendering of a visual effect or a mask for a visual effect. An effects pass might be an optical effect, such as a light glow or lens flare, or a particle effect, such as a cloud of smoke or plume of jet exhaust.

A depth map (also called Z-Depth or a depth pass) is a pass that stores depth information at each point in your scene. Some productions use depth maps rendered in a special depth map file format. Other productions use simulated depth maps which are rendered as standard image files just like any other pass, but with a depth-fading effect over objects with constant white shading.

Passes can be rendered one at a time by rendering differently modified versions of your 3D scene, or some software can set them up automatically or render more than one pass type at once.

Sample Uses For Passes

Here are ten example uses of why scenes are split into different passes in professional work (instead of trying to render the whole scene in one pass as most hobbyists do.)

Memory can be saved by not putting every object into a rendering at once, making complex renderings possible on ordinary PCs.

Changes can be made with little or no re-rendering. Often, just one element (such as a character) needs to be re-rendered, instead of a whole environment. Other adjustments, such as adjusting the darkness of a shadow or the color of a glow, can be made without any re-rendering, just by adjusting your composite.

Integration with live-action plates depends on separate passes. For example, if your character needs to cast a shadow onto the ground in a photograph, or appear reflected in a real pool of water.

Still Images can sometimes be used for some elements, especially if the camera isn't moving. For example, one still frame of a room might be composited behind every frame of a separately rendered animated character.

Recycling is often possible, where a separate element can be reused in different positions or times within a shot.

Reflections can be softly blurred in the composite, which eliminates the need for anti-aliasing or high-quality rendering for the reflection pass.

Particles can be used to create different effects in compositing. For example, if you wanted a natural refraction or heat-ripple effect from your particles, you could render them as a separate effects pass, then use the rendered particles as a mask for a glass distortion filter or warping of the background plate behind them.

Bump mapping can be applied selectively to reflections, beauty pass, or highlight pass, instead of having the same bump map on each element of the shader.

Glows can be created and manipulated in post by adding a blurred copy of your specular pass on top of the composite.

Depth of Field effects can be created without requiring any extra rendering time, by blurring separately rendered background layers, or by using a depth pass as a mask for a blur filter. You can also create atmospheric perspective (fading to blue or gray with distance) with a color correction masked by the depth pass.

Passes Passing


Normal Map
Diffuse Pass
Shadow Pass
Normal Render

Think I can't hav a Specular Map as there are no Blinns and what not. Undoubtedly I still need to do work on the passes and what the DEVIL is a beauty pass. Research must happen :p

Terrible News

So my PS3 broke today / last night.... it would appear the disc reader doesn't want to READ anymore... and therefore .... I'm guessing more work will be done. It's probably for the best. I might buy my Girl Friend a PS3 .... give it to her and then I can play Heavy Rain on it when it comes out on the 26th February. It's probably a good thing as it will mean I'll get 10x as much work done with just my Xbox 360 to play on... and I was addicted to COD anyway.... time to go COLD TURKEY for a while. It'll be a rocky road but I think I'll pull through :p

Friday, 29 January 2010

Note to self

Dan... CSC Media - Degree Show. Possible Advertising?

Another Note to myself -
Krispy Kremes
01322 624 171 - Bluewater Dept - Possible for a fund raiser!

Last week...

Last week I was meaning to put it on... butthen Sarah beat me to it... I know coz I'm following her Blog... Gad Damn it... oh well... anyway... Studio aka's BBC winter Olympics trailer... for the BBC... thinkin if our dust can be like this snow but fall a lil slower.... and lowerthe opacity...think we have a winner!!!! :D...
So much so.... I might actually e-mail Philip Hunt ... (done that now)

With Hallway


The kind of shot I was explaining to Sam... from this kind of angle see the hitman moving across the room.... I imagined it darker however it may be needed to be tweaked to fit the style of shot we want.... that can be done later on though. Lets just talk shots :p

Thursday, 28 January 2010

Somewhere In The Middle


So after asking the POV's of the team they said they liked between 2 and 5 on the MAIN blog... so thats what I was aiming for. I was also attempting light FOG however... the few attempts I did all ended up pretty appauling. I think I have a new idea of how to create it... it keep coming and going however I believe a Box with a number of segments will still work quite effectively however it will have to be a changing texture created elsewhere probably after effects.

Wednesday, 27 January 2010

Modelled a chest of drawers as well


I did this today as well.. a chest of drawers and a few paintings to hang and put in different places so thats cool... at least I have something to show on different areas around the walls.
Check That Crack!


Sorted it out :) The light in the corner is no more!! WOop Woop!


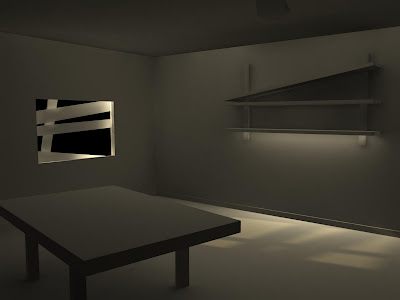
So today i put in a few more models as well as a crack in the wall on the corner (you can see it in the OCCLUSION shot)... I still need to roll up the carpet a little bit to make it look DIIIIIIRRRTTTTY ;) u love it! So yeh anyway its all going quite well this end. Must get on with my Dissertation though as we have a formative tomorrow.

I was having a couple of issues with light as you can see above. I think I sorted it slightly better though now. Tip for myself... it was outside! Makes sense though now if I look back. Was how I arranged the scene in the original and created out of a box...
Full thickness milk is apparently better than semi-SUPER-Skimmed :p

Tuesday, 26 January 2010

The Door Test 2


Just a quick Door animation test.

Those Dissertation Blues


Really not enjoying it but hey its gotta be done (dissertation).
This is what I've been up to this week so far... sorry its not much guys been swamped as per usual!

Saturday, 23 January 2010

Interesting - Faces

http://www.ted.com/talks/paul_debevec_animates_a_photo_real_digital_face.html

Interesting about digital faces. Researching for my DisserMAtation however could still be interesting for all.

Thursday, 21 January 2010

Door Test


Ok so this is just a quick light test from under the door.
Really is not visible...but hey... I can see it and it does its job lol

Wednesday, 20 January 2010

Quick Mini Animation Test


Just playing around with the background animation that will be in the Hitmans room - Fan spinning. Lighting bulb moving due to the fan.

Friday, 15 January 2010

New Desk


Didn't think the chest of drawers suited it... so changed it... the other ones might work in the motel though... But I just messed up a file so I need to go back one and re-do a couple of things. Yay

Wednesday, 13 January 2010

Today


So thats what I've been up to today really guys. Just thought I'd show you what its going to look like... you can visualise a few more books in a mess as well as BOOKS replacing the blocks that I've 'blocked out' with. Hope you like the Occlusion coz it took about 26mins to render!

Tuesday, 12 January 2010

HouseHold Maintenance


Just been re-arranging my hypergraph and naming all my building blocks. This should make it easier when it comes to texturing. I've also gone through and deleted much of the history (however there are plenty of saves to go back to if needs be!! Always back up your work boys and girls. and never have just ONE copy on the go!)

The long line is all brick work... which will hopefully be done within texturing however I'm leaving it in there for now to suggest...

Insight


Used the Godly Saunders Approach to display this piece... :p

Animation Reference for some PENCIL tests!

http://www.penciltestdepot.com/
Got classics that Fraser Showed us as well as more.

Monday, 11 January 2010

Glow On...Glow Off


Sunday, 10 January 2010

Schedules


I know I won't have time to upload these at a later date... so figured I'd do them now.... before I forget... the schedules were updated.


Saturday, 9 January 2010

Fixed I think...


28mins


This shot took 28mins to render....theres nothing even too it...mayb I boosted the photon amount too much... there must be an easier way to get images without waiting 28mins....ITS NOT EVEN THAT GOOD!...You may notice I fixed the splotchies on the wall though!!!

More to Chew Over


FG + GI now experimented with however I think it may need more... accuracy again needs sorted out it would appear. Not sure how high it will allow me go though before it goes blotchy (disco) Managed to tweak the shadows using Raytrace shadows as you can see the differences above - less defined.

Final Gathering + GI


This is Global Illumination AND Final Gathering. Just doing some rendering while watching Peter Kay... love it! Figured I might as well get a lil bit of testing done. Seems accuracy misses the correct number here ... so still needs work. Wonder if FG will work without GI... might try it later.

Friday, 8 January 2010

Yet Another Fail...


Image above is obviously reflecting too much... and I see that. Easily tweaked as you can see below...


So I was attempting to get he colours of the boards right now without tweaking the light itself (as this would effect the room obviously. I came to the conclusion that I SHOULD defiantly be modelling and not doing lighting yet!!! still it was worth playing around with while I've got the time. I think Area lights may be a better way forward than Global Illumination but more tests are still needed obviously. The closest I got was these images where I actually selected the objects and over rid the Global Illumination settings (accuracy and Radius was all that could be effected) however this was still not quite the desired effect as it would appear I have lost shadows... did I have them before over ridding it? I can't remember however a glance below will tell me. Anyway...modelling and getting the room looking tip top is my first priority and I need to STOP playing around with lights!

Thursday, 7 January 2010

An Intense Boost.

Ok...so each one of these are different... apparently?
I tweaked a number of different aspects in each image and then took them into photoshop... and apparently I was just waisting my time... the only one that ACTUALLY made a difference in this stage was the actually photon intensity and boosting that up made it slightly lighter... figures. I also boosted accuracy in some of them and radius, and a whole load of other settings... I like the boosted intensity though.


Schedule